
Label Boxes for Moving: The Ultimate Aussie System for a Stress-Free Unpack
Moving house. It’s a mix of excitement for a new chapter and the undeniable chaos of packing up your entire life. In the middle of this whirlwind, it’s tempting to chuck things in boxes, slap on some tape, and call it a day. But take it from anyone who’s done it before: a poorly labelled box is a future headache waiting to happen.
Imagine arriving at your new home, exhausted, only to face a mountain of identical brown boxes. Where’s the kettle for a much-needed cuppa? The phone chargers? The kids’ favourite toys? Even the best removalists will tell you that a proper labelling system is the single most effective thing you can do to turn unpacking chaos into organised calm.
This guide will show you a foolproof system for labelling your moving boxes like a pro, ensuring your move is smoother and your unpacking process is a breeze.
Why a Good Labelling System is a Game-Changer
Before we get to the “how,” let’s talk about the “why.” Spending a few extra seconds labelling each box correctly will:
- Save You Time and Sanity: You’ll know exactly where each box goes in the new house, eliminating the “box shuffle” and endless searching.
- Help Your Movers: Removalists can work faster and more efficiently if they know which room to take each box to, saving you time and money.
- Protect Your Belongings: Clearly marking “FRAGILE” or “THIS WAY UP” prevents accidental damage to your precious items.
- Prioritise Unpacking: You can easily find and open the most important boxes first (hello, “Essentials Box”!).
First, Gather Your Labelling Supplies
Get your tools ready before you start packing the first box. There’s nothing worse than having to hunt for a marker mid-pack.
- Permanent Markers: Get a few thick, black permanent markers. Choose a high-quality brand so the ink won’t smudge or fade. Coloured markers are also great for colour-coding.
- Packing Labels (Optional but Recommended): You can buy pre-printed or blank adhesive labels from Officeworks or Bunnings. They provide a clean, consistent look.
- Packing Tape: While not a labelling tool itself, you’ll need it to seal the boxes before you can label them.
The Foolproof Four-Point Labelling System
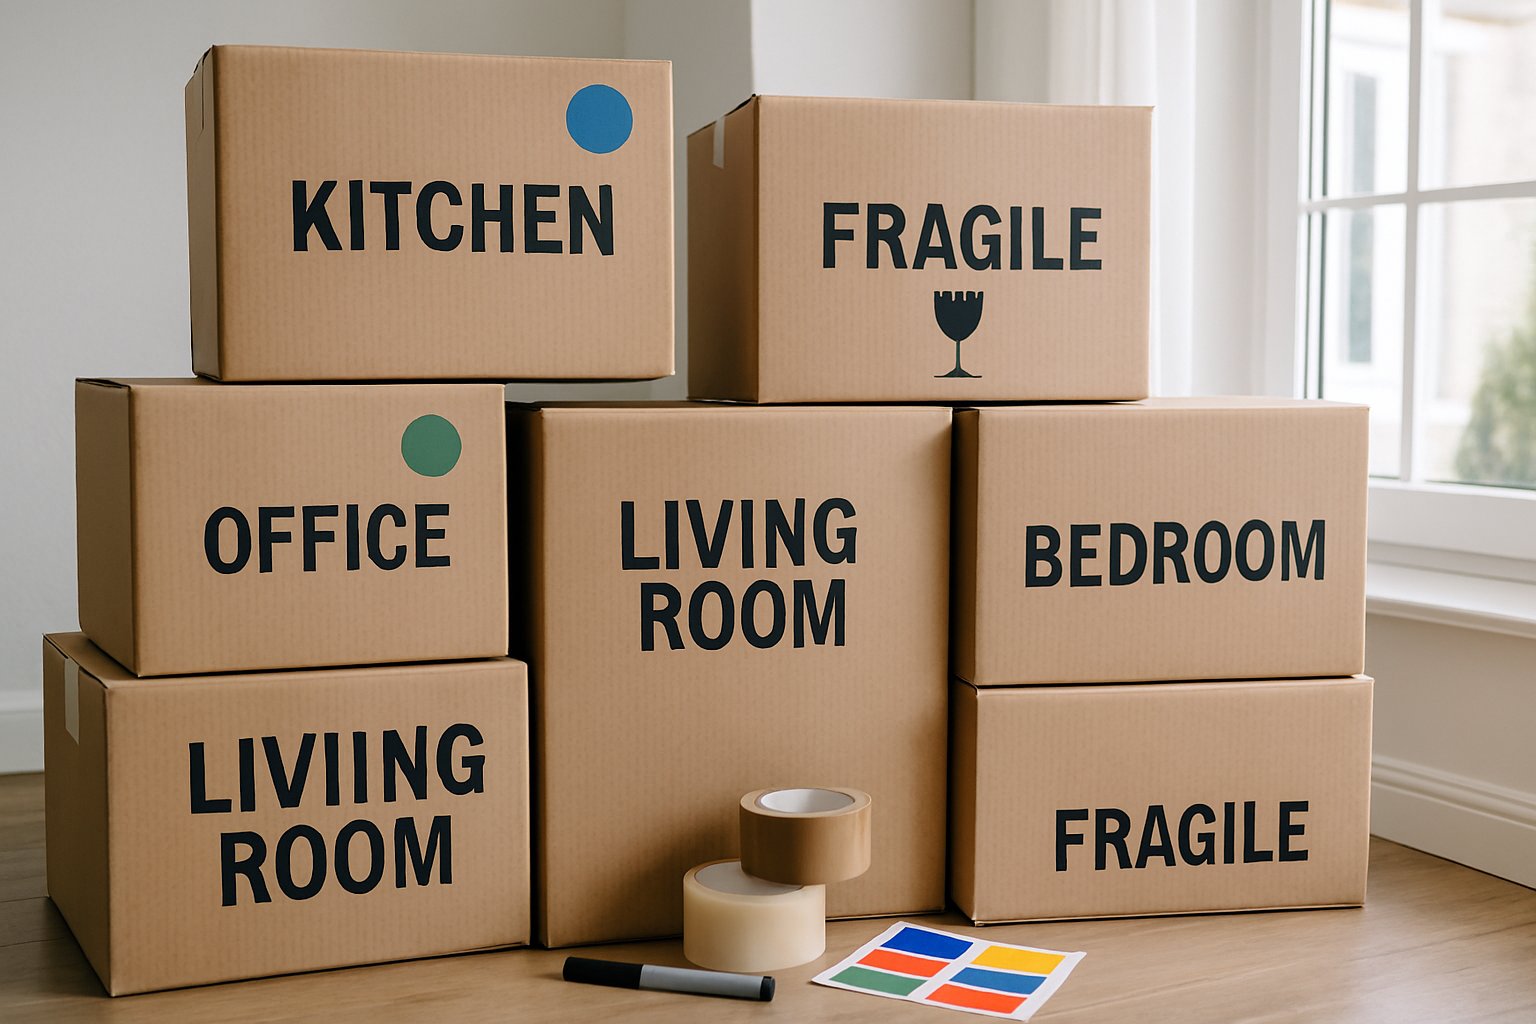
For a truly effective system, every single box should have four key pieces of information. Write clearly and largely on at least two sides of the box (and the top if you’re feeling ambitious!).
1. The Destination Room
This is the most critical piece of information. Where in the new house does this box belong? Be specific. Instead of “Bedroom,” write “Main Bedroom,” “Liam’s Room,” or “Guest Room.”
- KITCHEN
- LOUNGE ROOM
- BATHROOM
- STUDY
- GARAGE
2. The General Contents
List the main items inside the box. You don’t need a full inventory on the outside, but a summary is crucial. This helps you find specific things without opening ten different boxes.
- Good Example: KITCHEN – Pots & Pans, Cutlery
- Bad Example: KITCHEN – Stuff
Being specific prevents you from opening a box labelled “KITCHEN” expecting the coffee machine, only to find it full of cookbooks.
3. Handling Instructions (If Needed)
This is all about protecting your gear. Use big, bold letters for these essential warnings.
- FRAGILE: For anything delicate like glassware, dishes, or picture frames.
- HEAVY: A courtesy to your back and your movers. Use this for boxes filled with books, tools, or weights.
- THIS WAY UP ↑: Essential for boxes containing liquids, appliances, or items that must stay upright. Draw arrows for extra clarity.
4. Box Number & Inventory List (The Pro Move)
This step is optional but turns your move from amateur to professional level.
- Number Each Box: As you pack a room, number the boxes sequentially. For example: KITCHEN 1 of 8, KITCHEN 2 of 8, etc.
- Create an Inventory List: Use a notebook or a simple spreadsheet. As you seal and number a box, jot down a more detailed list of its contents.
- KITCHEN 1 of 8: Toaster, Kettle, Coffee Mugs, Tea Towels.
- KITCHEN 2 of 8: Everyday Plates, Bowls, Cutlery Tray.
This system gives you peace of mind that nothing has gone missing and allows you to find a specific item (like the toaster for your first breakfast) instantly.
The Colour-Coding Method for Visual Unpacking
If you’re a visual person, adding colour-coding is a fantastic hack. Assign a different coloured marker or coloured sticker to each room.
- Blue: Kitchen
- Red: Main Bedroom
- Green: Lounge Room
- Yellow: Bathroom
Place a coloured sticker on the door of each room in your new home. This way, you and your movers can see at a glance where everything goes, no reading required!
Don’t Forget The “Open First” Essentials Box
This is the most important box of your entire move. The “Essentials Box” contains everything you’ll need for your first 24 hours in the new place. Label it clearly: “OPEN FIRST – ESSENTIALS” and keep it with you in your car, not in the moving truck.
What to include:
- Kettle, instant coffee/tea bags, sugar, mugs
- Toilet paper and hand soap
- Phone and laptop chargers
- Basic toiletries (toothbrush, toothpaste)
- A set of PJs and a change of clothes for everyone
- Important documents, keys, and medications
- A simple tool kit (screwdriver, Allen keys)
- Snacks and bottled water
Frequently Asked Questions
What is the best marker to use on moving boxes?
A thick, black, oil-based or alcohol-based permanent marker is best. It won’t smudge if it gets a little damp and is bold enough to read from a distance.
Should I label the top or the sides of the box?
Always label the sides! When boxes are stacked, you won’t be able to see the top. Labelling at least two sides (one long, one short) ensures you can identify the box from any angle.
How specific should I be with the contents?
Be specific enough to be helpful, but you don’t need to list every single item. “Winter Jumpers & Scarves” is better than “Clothes.” “Kids’ Lego & Board Games” is better than “Toys.”
Is a moving inventory list really necessary?
For a small move, it might be overkill. But for a larger family home, it’s invaluable. It provides a complete record of your belongings for insurance purposes and makes finding specific items incredibly easy.
By taking a little extra time to label your boxes with this clear and consistent system, you’re not just packing boxes—you’re setting yourself up for a successful, low-stress start in your new home. Happy moving